Home > Web Based Apps > Voki > Sharing Your Voki - Voki
Sharing Your Voki - Voki
Once you've created an account and made your Voki, you can now share your Voki by publishing it to a blog or another website, sending it to a friend via email, or by directly sending a permalink.
Quick Links to Sections in this Article:
Sharing Your Voki
If you haven't already created a Voki account, you can learn how with the Creating an Account article. If you haven't already created a Voki, learn how with the Making a Voki article.
Step 1:
Log in to your account at http://www.voki.com and click on the My Voki tab.
 Step 2:
Click on Publish your Voki. Step 2:
Click on Publish your Voki.
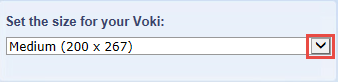
 Step 3:
Select a size for your Voki by using the indicated drop-down arrow. Step 3:
Select a size for your Voki by using the indicated drop-down arrow.
 Step 4:
Choose how you would like to share your Voki.
Step 4:
Choose how you would like to share your Voki.
Your options are:
A. Posting it directly to Facebook, Twitter, Google+, WordPress, or Blogger.

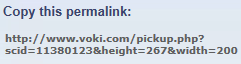
B. Copying the provided permalink and sending it to someone:
C. Copying the provided HTML code and placing it on your webpage.
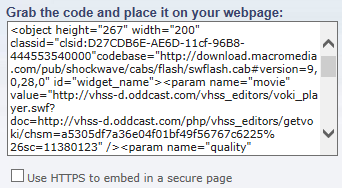
If you want to embed the Voki within the learning management system, it is best to check off the "Use HTTPS to embed in a secure page".
Sending Your Voki to a Friend
Step 1:Click on Send to a Friend. 
Step 2:Type in your name and email.
 Step 3:Type in the recipient's email. Step 3:Type in the recipient's email.
Step 4:Type in a subject.
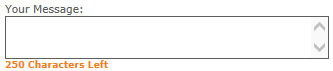
Step 5:Type in your message.
Step 6:Click Send.

Congratulations! You have officially shared your Voki.
| Author: andersonjm | Last Updated: 7/2/2015 2:13 PM | Page Views: 3880 |
https://helpdesk.etown.edu/helpconsole2012/kb/default.aspx?pageid=sharing_your_voki
|