Home > Classroom Technology > Classrooms/Event Spaces > Nicarry > Nicarry 104, 106, 129
Nicarry 104, 106, 129
Technology instructions for the Nicarry 104, 106, and 129 general purpose classrooms. If you experience any problems, call ext. 3333 or email the Help Desk at mediaservices@etown.edu. Please visit our Web site at http://www.etown.edu/ITS for additional information.
Quick Links to Sections in this Article:
Crestron Basics
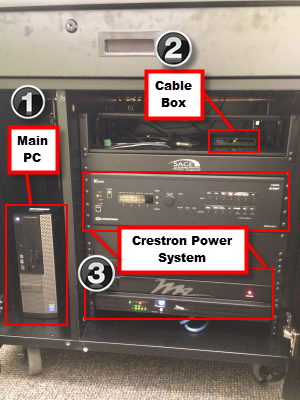
1. Main PC - Turns on the main computer. You can also use the provided USB ports to plug in a flash drive.
2. Cable Box - You will not have to touch this. To control the TV settings, use the Cable Tuner option on the touch panel.
3. Crestron Power System - These are the main system controls for the Crestron Podium. You will not have to touch these controls.Every piece of equipment that you'll use in Nicarry 104, 106, and 127 can be controlled by the touch screen found on the Crestron podium.

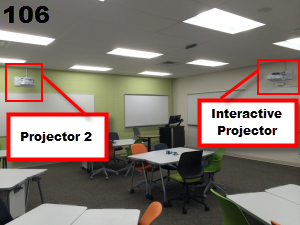
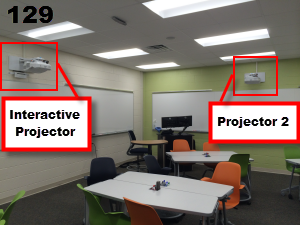
This podium uses two different projectors. The projector on the right side is labeled Interactive Projector. The whiteboard under this projector acts as a touch screen. The projector on the left side is Projector 2. The whiteboard underneath this projector is not a touch screen.
Locations of the projectors may vary depending on the room.
.png)
Notice: Please avoid writing on the interactive white board.
Using the Crestron Podium
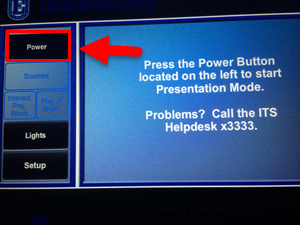
Turn on the system with the indicated Power button.
On the left-hand side of the screen you'll find the Main Controls.
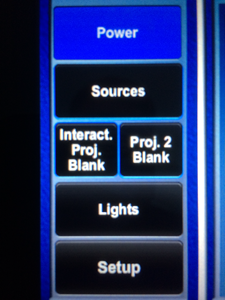
Here, you can toggle between the sources screen, lighting controls, display settings, as well as administrative setup.
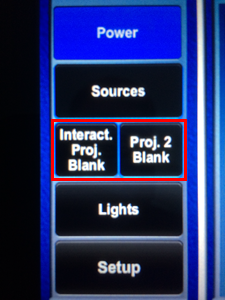
Click Interact. Proj. Blank and/or Proj. 2 Blank to turn either of the screens on or off. Blue indicates screens turned off, black indicates screens turned on.
Next, you'll find the Media Sources.
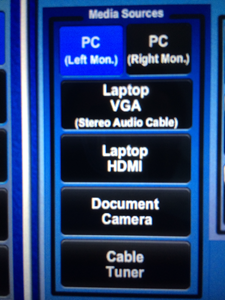
This is where you control which input you are using. You can use the podium computer (screens labeled "PC [Left Mon.]" and "PC [Right Mon.]"), a laptop, a document camera, and even a cable tuner. Any of these inputs can be projected onto either of the projector screens.
Next to Media Sources you'll find Media Destinations.
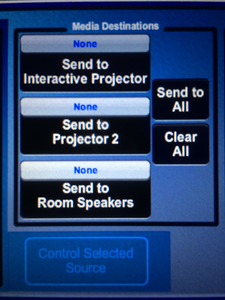
This is where you can choose how your selected input is displayed.
And finally, all the way on the right side of your screen you'll find the System Volume control.
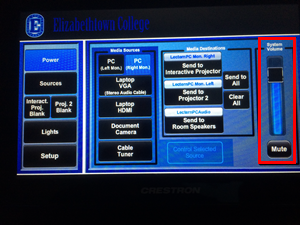
Move the dial up to turn up the volume, move the dial down to turn down the volume, and press the Mute button to mute the system's volume.
Media Sources
The Media Sources section of the home screen is where you can control which inputs you are displaying. Each button corresponds to a different input.
PC (Left Mon.)
Click the PC (Left Mon.) button to display what's on your main computer's left monitor to either projector screen. No need for any additional attachments; simply press the button and then decide where you would like to display your screen with the Media Destinations section.
.png)
PC (Right Mon.)
Click the PC (Right Mon.) button to display what's on your main computer's right monitor to either projector screen. No need for any additional attachments; simply press the button and then decide where you would like to display your screen with the Media Destinations section.
.png)
Laptop VGA
Click the Laptop VGA (Stereo Audio Cable) button to display a laptop's screen via a VGA cord.

To connect via VGA, plug in the provided VGA cord as well as the provided audio cord into the indicated inputs on your laptop.
.png)
Laptop HDMIClick the Laptop HDMI button to display a laptop's screen via an HDMI cord.
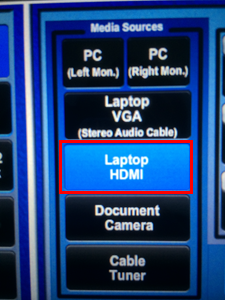
To connect via HDMI, plug in the provided HDMI cord into the indicated input on your laptop. You do not have to plug in an audio cord in addition to the HDMI cord.
.png)
Notice: If you've connected your laptop (via VGA or HDMI), make sure your are on the right screen resolution settings. If you've connected your laptop and only a blank desktop screen displays, you are likely on the wrong screen resolution settings. To fix this, follow these steps:
Step 1:Right-click on your desktop screen and click Screen Resolution..png)
Step 2:Where it says Multiple Displays, click the indicated drop-down arrow and make sure it's set to Duplicate these displays rather than Extend these displays.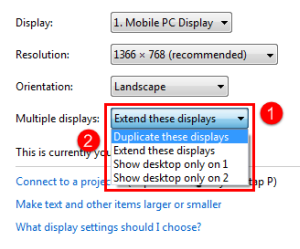
Step 3:Click Apply.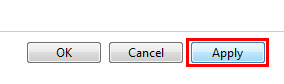
Step 4:
Click Keep changes. 
Step 5:
Click OK. 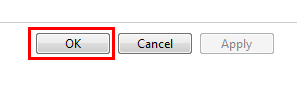
Document CameraThe Document Camera button displays a document camera's screen onto either projector screen.
To connect a document camera, plug in the provided HDMI cord into the indicated HDMI input.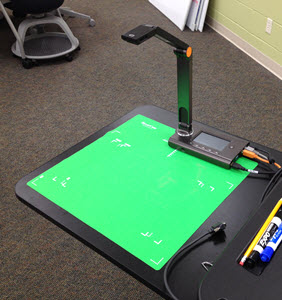

Click the Document Camera button to display what's under the document camera onto either whiteboard. Click Control Selected Source to change settings on the document camera.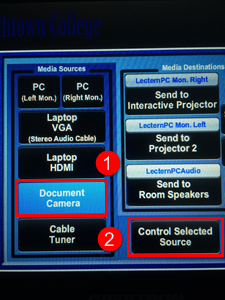
Cable Tuner
The Cable Tuner button allows you to broadcast television onto either projector screens.
To control the television settings, first click the Cable Tuner button and then Control Selected Source. 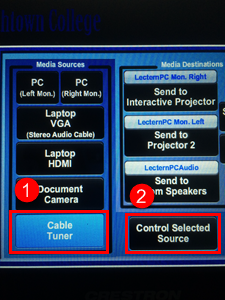
Use the indicated numbers or the Channel Up and Channel Down buttons to change the channel you are watching.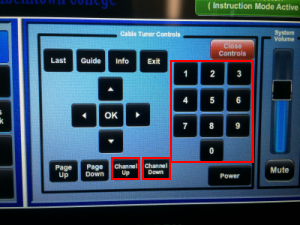
Press Guide and then use the indicated arrow keys to navigate the TV Guide..png)
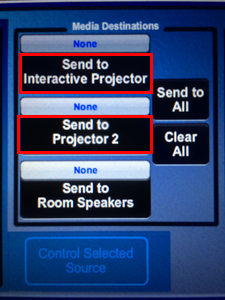
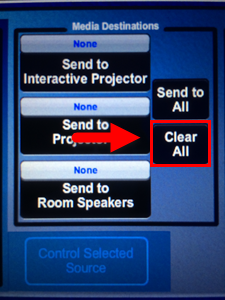
Media Destinations
The Media Destinations section of the Sources screen is where you control how you display each input.
To display your desired input's screen with either projector, first choose the input you would like to use in the Media Sources section.
After choosing your input source, click either Send to Interactive Projector to display your input's screen onto the board on the right, or click Send to Projector 2 to display your input's screen onto the board on the left. You can choose to project onto one board at a time or both at the same time.
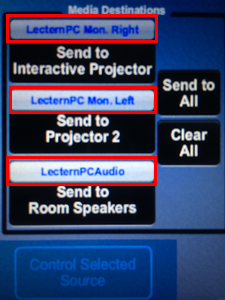
The gray box will tell you which input is being displayed.
Click Send to All if you wish to display your input's screen onto both of the whiteboards.
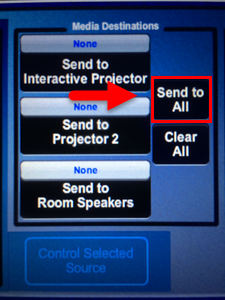
Click Clear All to clear all displays.
Note: You don't have to display just one input on either board. You can have one input display on one board and a different input display on the other board. For example, you can choose to display a PC monitor screen on the interactive white board while also displaying a laptop's screen on the other whiteboard.
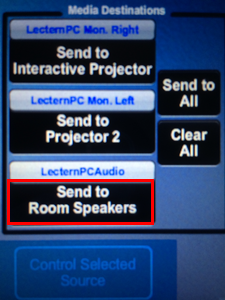
Click Send to Room Speakers to sync up a specific input with the room's speakers.
| Author: andersonjm | Last Updated: 5/27/2021 1:33 PM | Page Views: 5779 |
https://helpdesk.etown.edu/helpconsole2012/kb/default.aspx?pageid=104__106__129
|