Home > Classroom Technology > Classrooms/Event Spaces > Steinman > BLR Steinman 114
BLR Steinman 114
Technology Instructions for Brinser Lecture Room (Steinman 114). If you experience any problems, call ext. 3333 or email the Help Desk at mediaservices@etown.edu. Please visit our Web site at http://www.etown.edu/ITS for additional information.
Quick links to sections in this article:
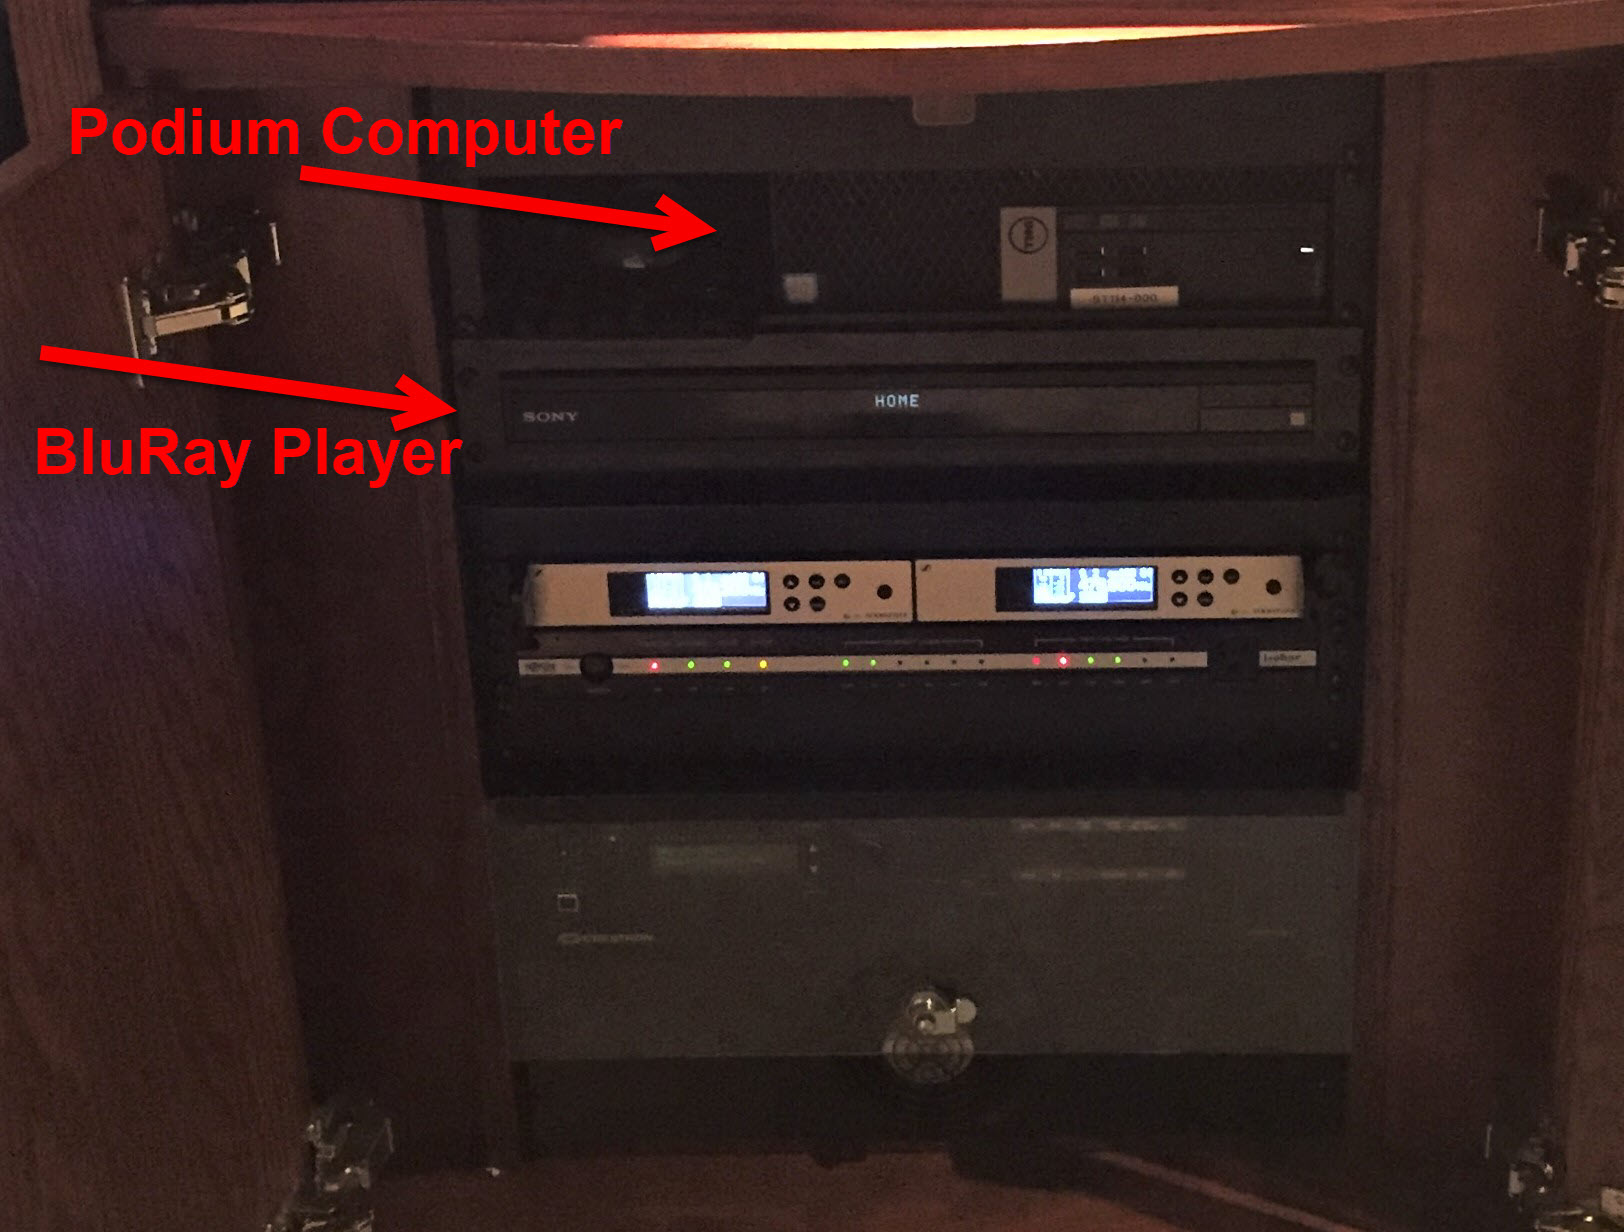
Using the Podium Computer
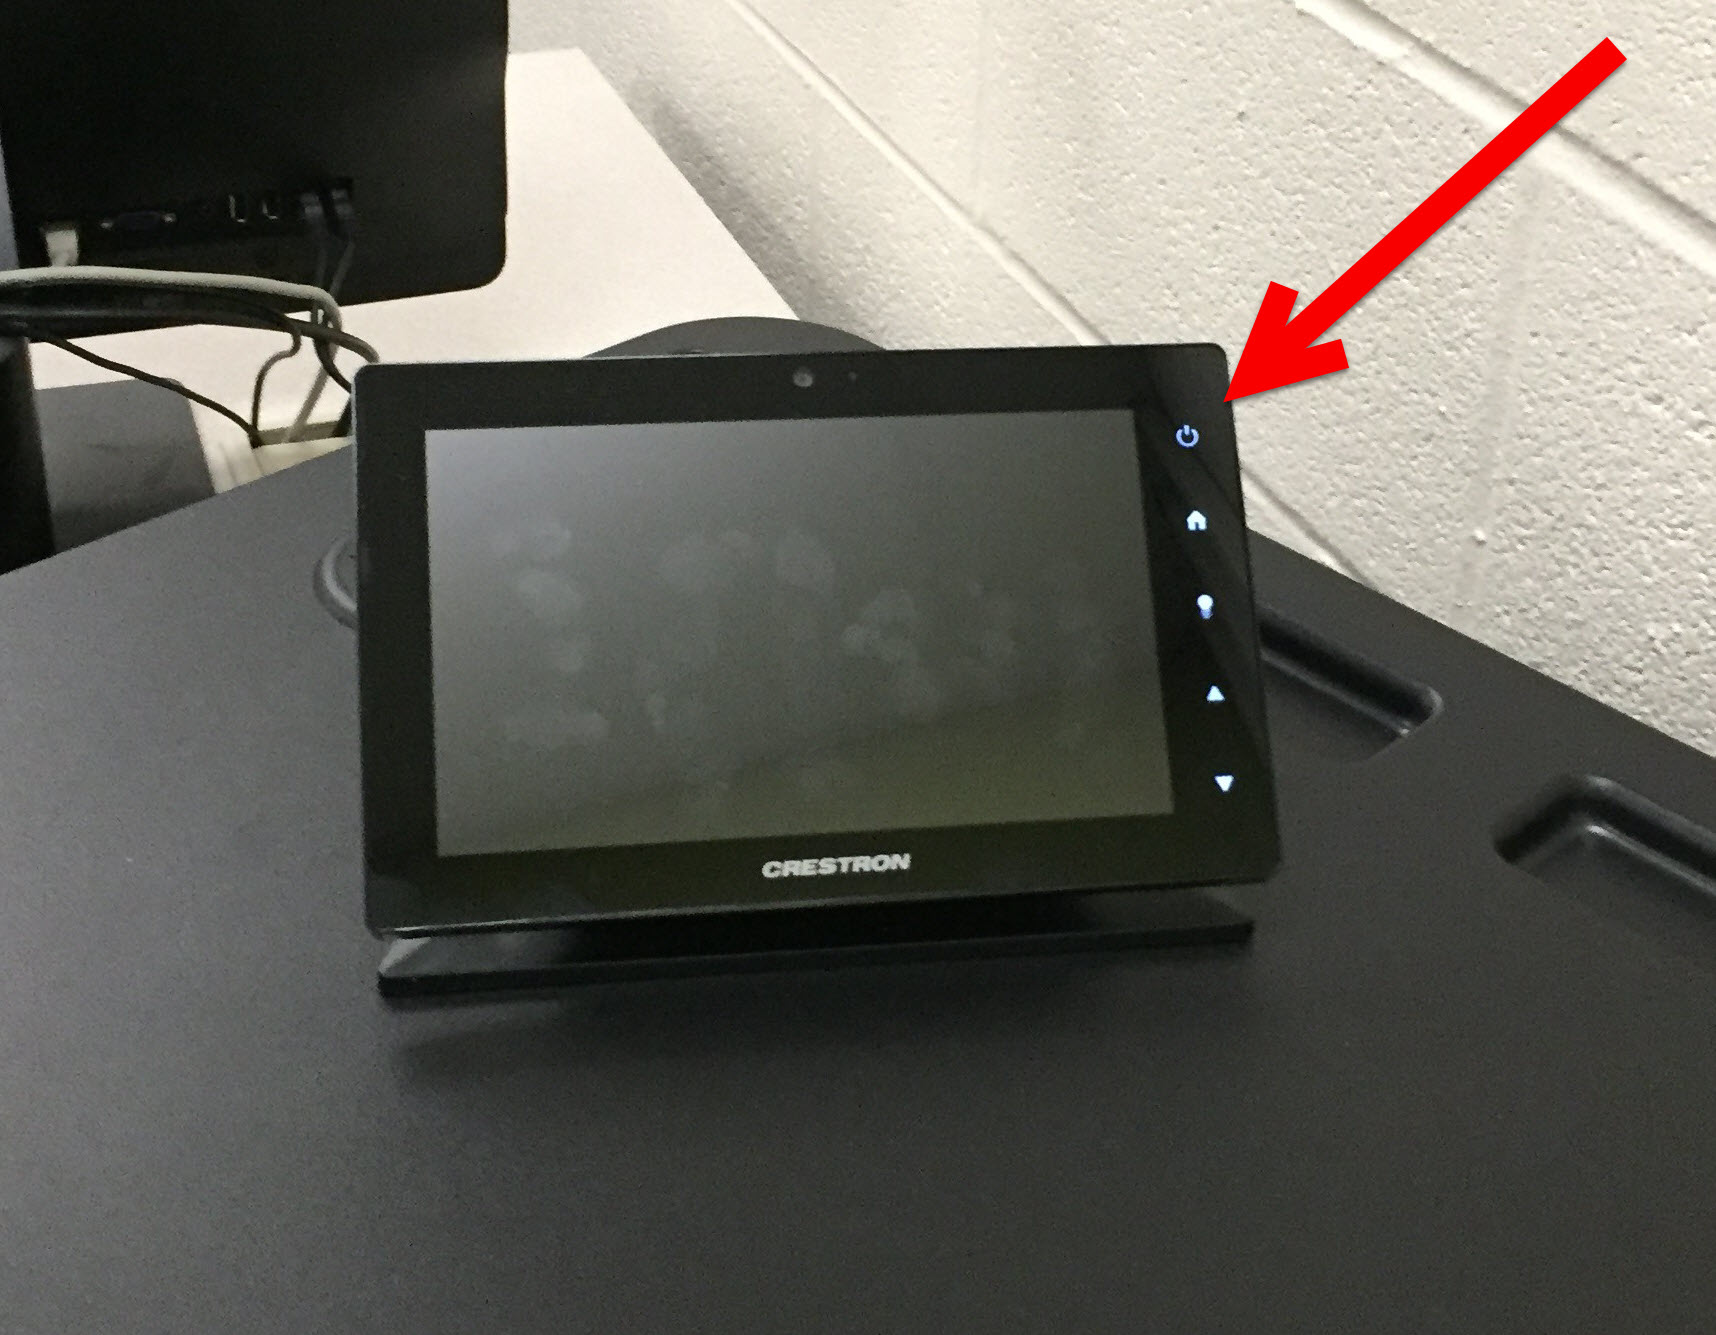
Step 1:Touch the power button on the Crestron display.
Step 2:Touch Lectern PC.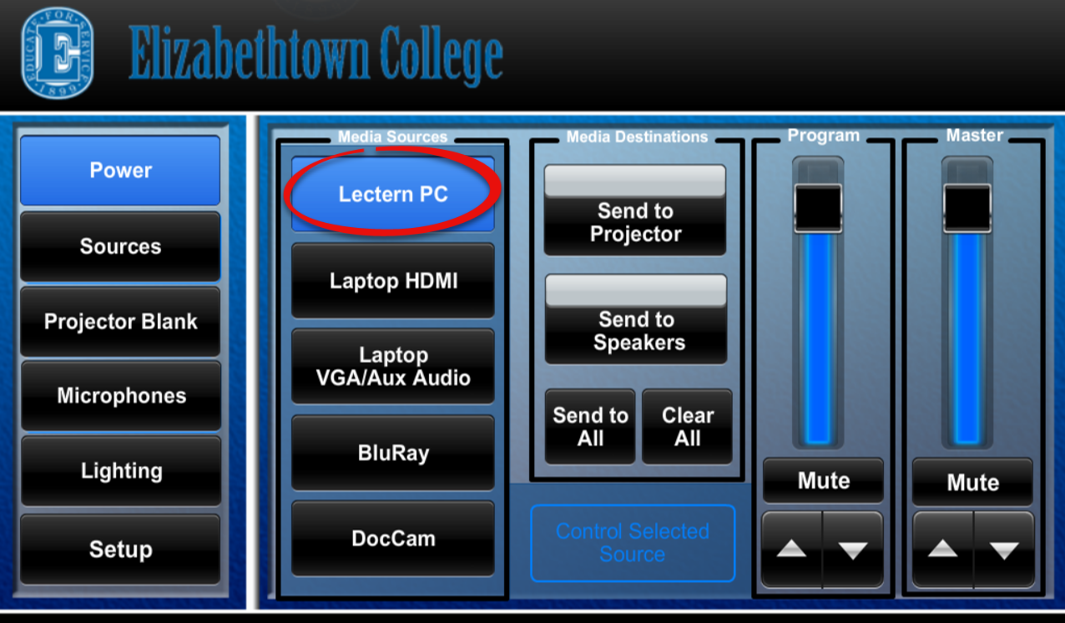
Step 3:Press the power button located on the front of the computer and monitor, if not already on. Log on with your network username and password.
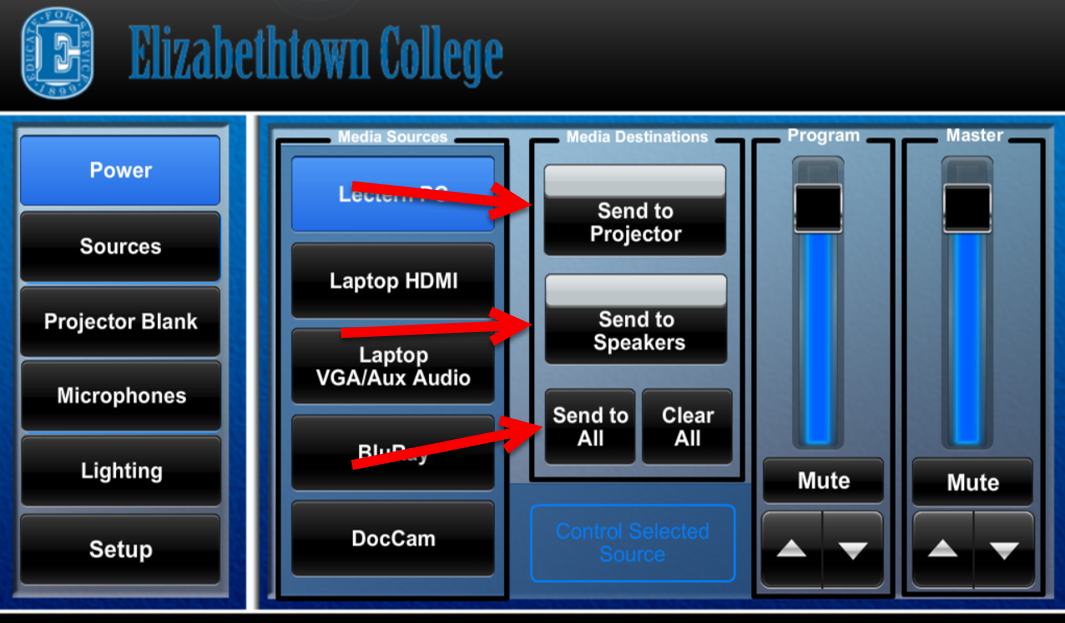
Step 4:Choose where to send the source: Projector, Speakers, or Send to All.
Warning: Computer resets upon restart and shut down. Save your files to the network or removable media only.
Using a Laptop Computer
Note: It is recommended that you register your laptop on the college network to ensure better connectivity.
Step 1:Begin with the laptop turned OFF in order to connect.
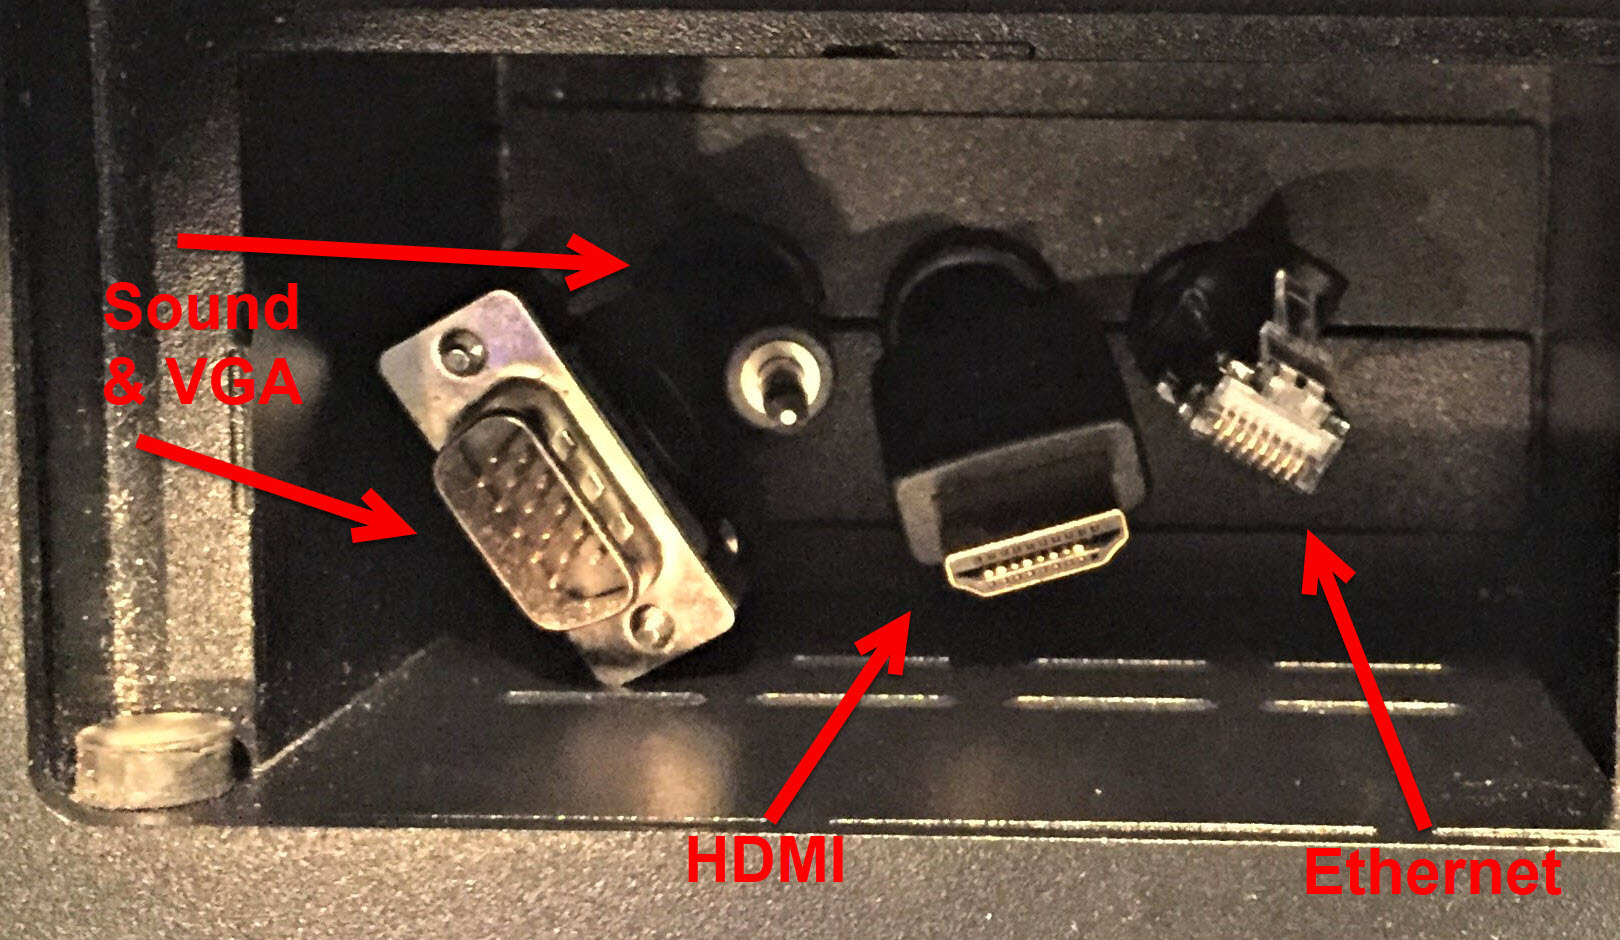
Step 2:Connect the laptop with one of two methods:
1) connect the HDMI cable to its port and the Ethernet cable to the network jack; or
2) connect the VGA cable to the its port, the Ethernet cable to the network jack, and the sound cable to the headphone jack on your laptop.
Step 3:Touch the power button on the Crestron display.
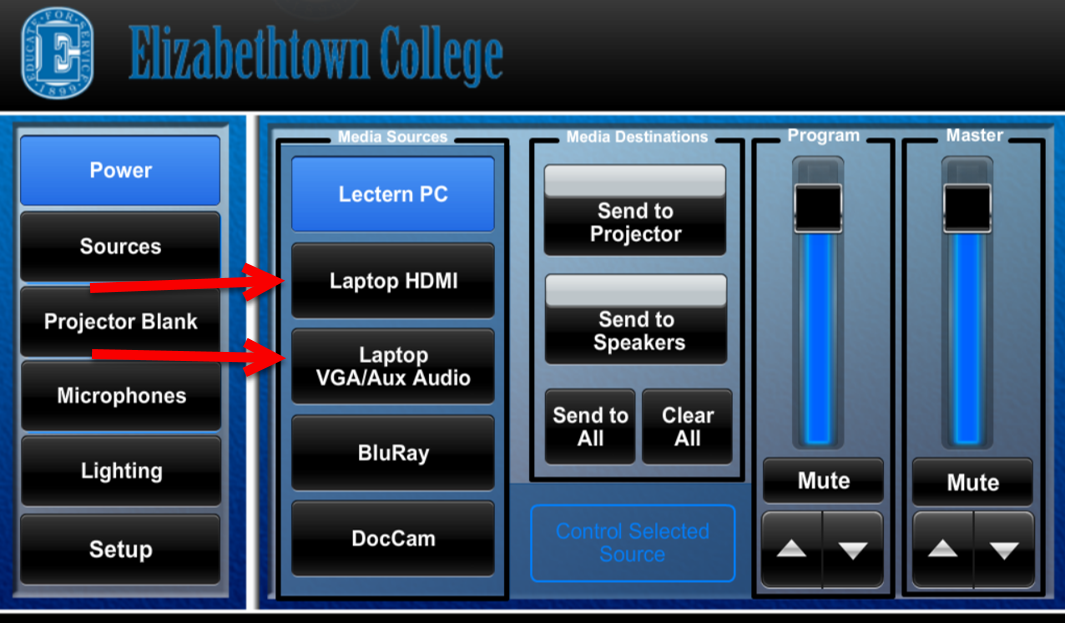
Step 4:Touch the relevant button: either Laptop HDMI or Laptop VGA/Aux Audio.
 Step 5:Turn on the laptop by pressing its power button. If you need power, plug your power adapter into the outlet in the cable box.Step 6:Press the Windows key + P and click Duplicate to make the projector display the same as your screen. Step 5:Turn on the laptop by pressing its power button. If you need power, plug your power adapter into the outlet in the cable box.Step 6:Press the Windows key + P and click Duplicate to make the projector display the same as your screen.
Using the BluRay Player
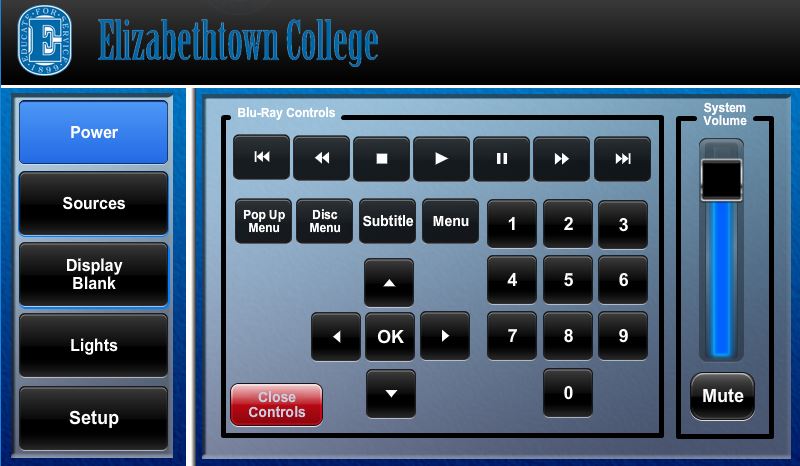
Step 1:Touch BluRay.

Step 2:Press the POWER button to the left of the disk drive.Step 3:Insert your disk.Step 4:Use the buttons on the touch screen to control the media. The volume buttons are located at the right side of the screen.
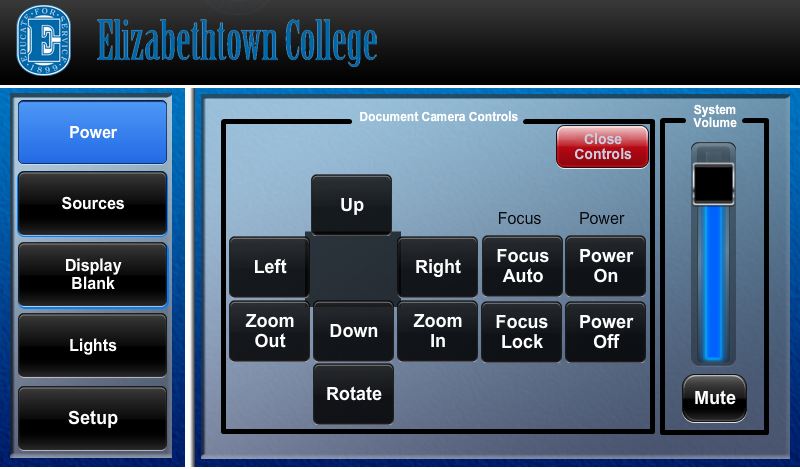
Using the Document Camera
Step 1:Touch DocCam.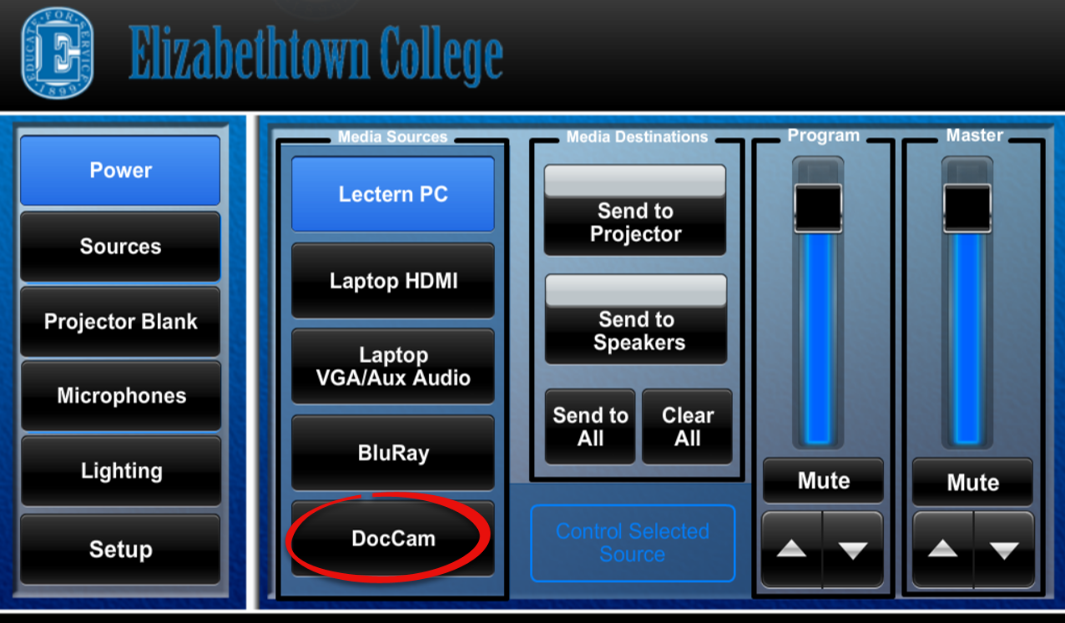
Step 2:Make sure that the Document Camera is on and in position. The power switch is on the left-hand side. The release is found at the bottom of the Camera arm.
Step 3:Use the buttons on the Document Camera to adjust the lighting and view of your objects.
Using the Remote
Step 1:Turn on the remote with the power switch on the top left side.
Step 2:Use controls as desired.
Projector Blank
Step 1:To blank a projector, touch Projector Blank.
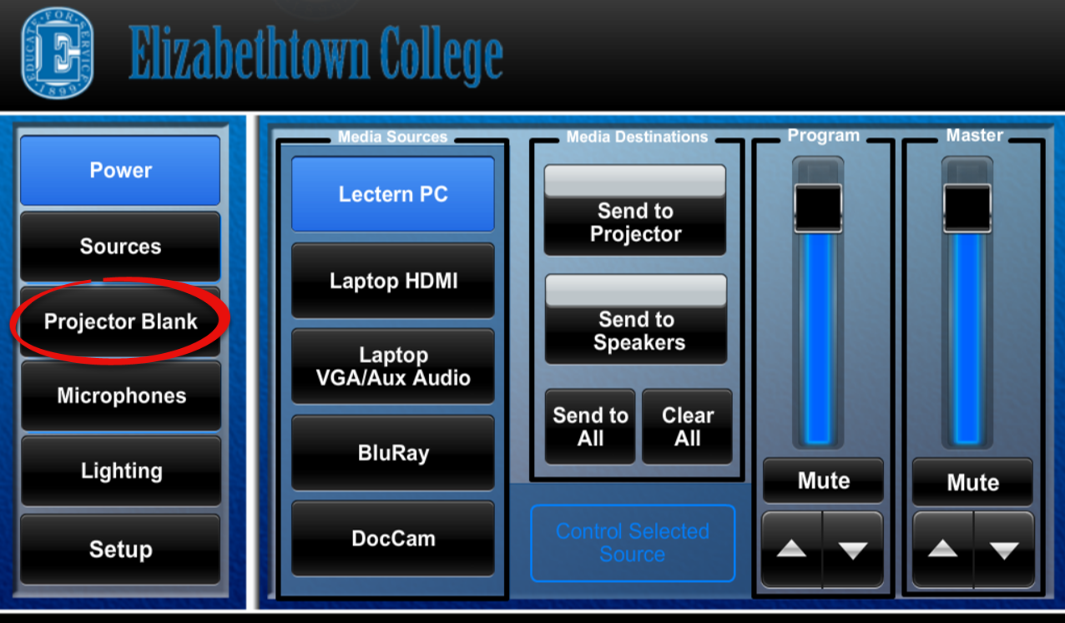
Step 2:Touch Projector Blank again to re-enable the projector.
Microphones
Mic controls are available under the Microphones tab. You can adjust the sound for the individual microphones or overall volume.
The mics can be turned on and off my holding down the red power button on the bottom. If a red light-up button near the head is on, the mic is live. If you don't see that light, press the button. 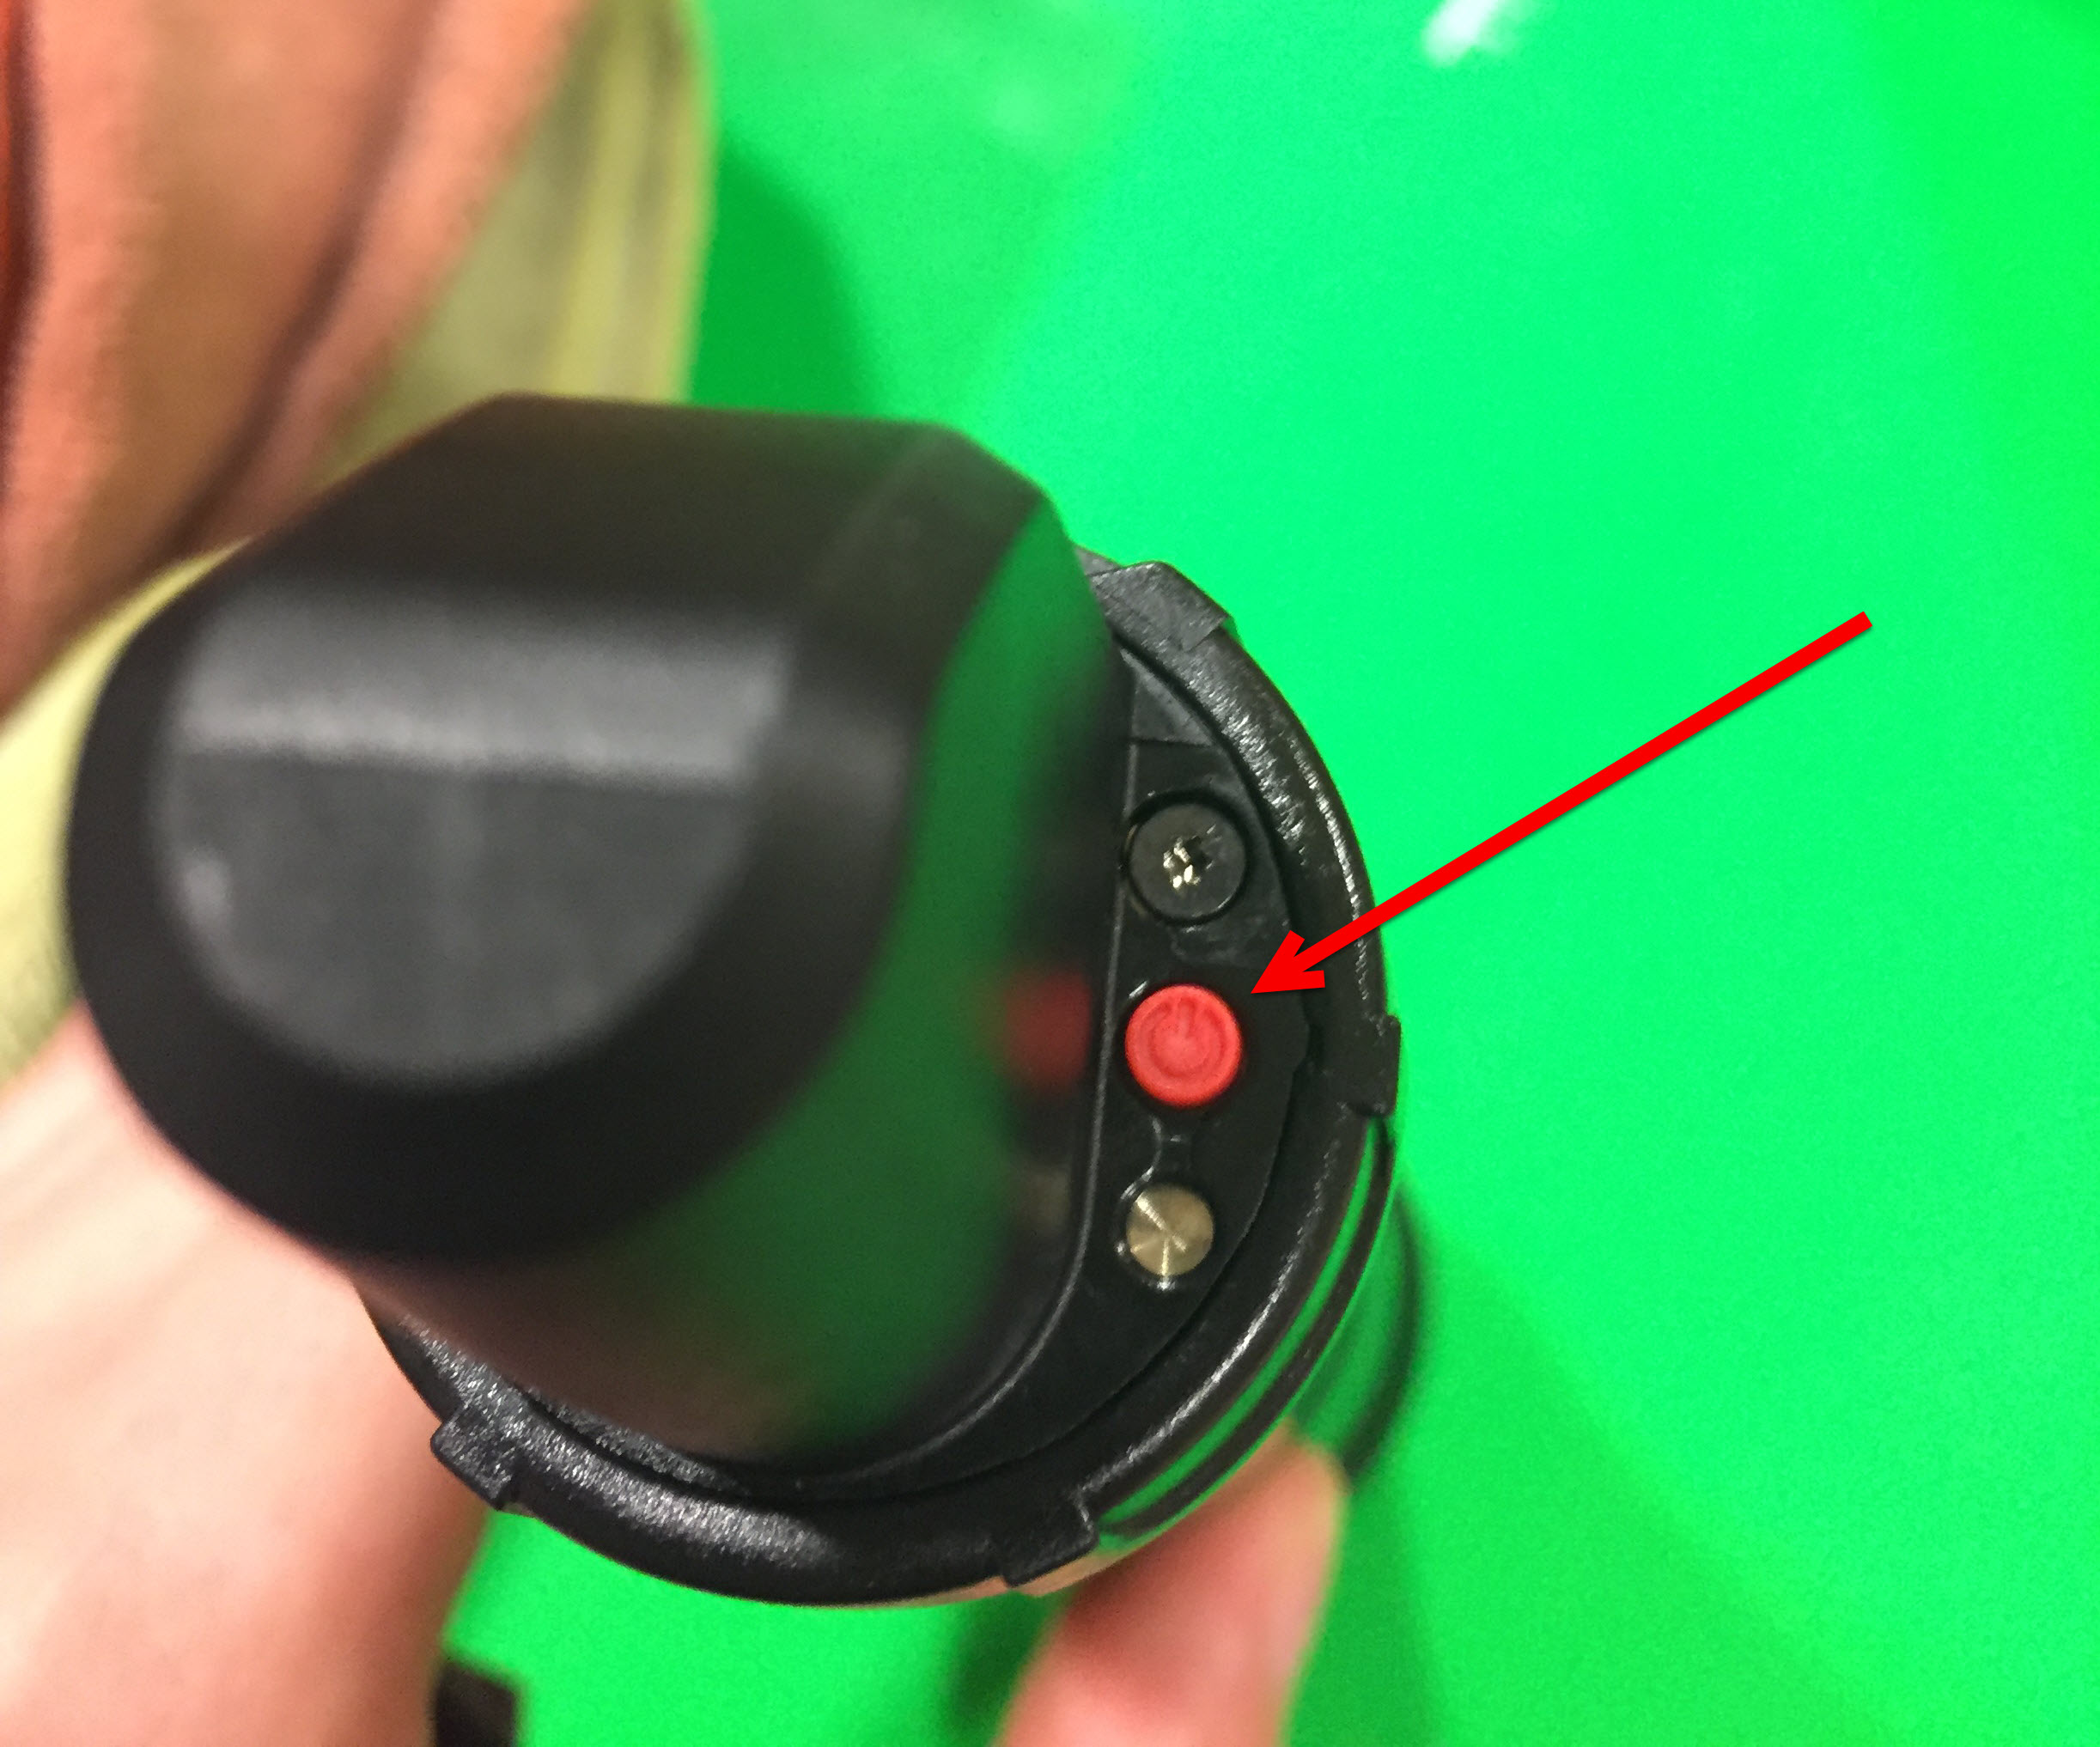
Do not attempt to change settings or channels on the mics.
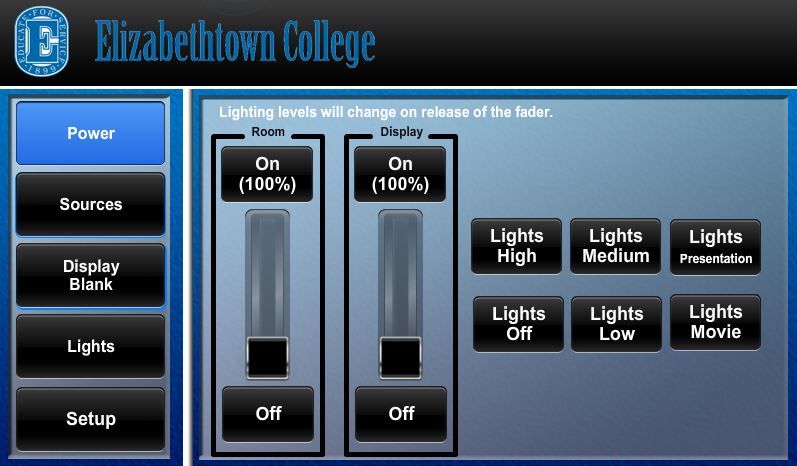
Lighting
Step 1:The lights can be adjusted while the rest of the system is off. Tap Lighting on the left sidebar.
Step 2:Use the controls to adjust the lights as desired.
Turning Off the Projector
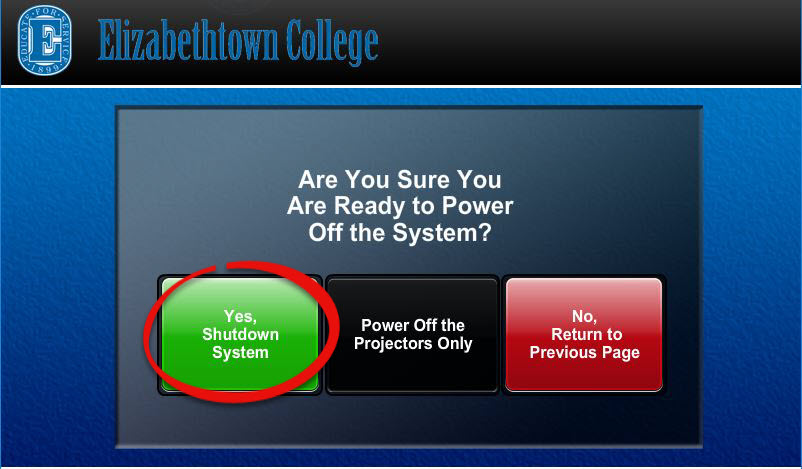
Step 1:Turn off the projector by touching the POWER button on the left sidebar. You will be prompted, “Are you sure you want to power off the system?” Touch YES.
Step 2:Turn the computer off by clicking on the START button at the bottom left of the screen, then select the SHUTDOWN option. Choose SHUTDOWN in the dialog box and click OK.
Step 3:If you want to turn on the projector again, give the machine several minutes to cool down before restarting the projector.
Warning: Do NOT turn off the Surge Protector!
Make sure that the projector is turned OFF because it is very expensive to replace the bulb.
| Author: karperc | Last Updated: 5/27/2021 1:25 PM | Page Views: 6615 |
https://helpdesk.etown.edu/helpconsole2012/kb/default.aspx?pageid=blr__st114_
|